I was looking for a project to improve my knowledge of the most significant ReactJS feature in recent time – hooks, alongside the new bits in TypeScript 3.7. Something relatively simple, in the spirit of the previous games I’ve built in TypeScript/ES6, seemed to be a Minesweeper clone. In this post, I will share my learnings and the source code.
If you are interested in playing the game before reading the blog post, it’s available here – minesweeper.ivaylopavlov.com
Source is available on GitHub. Consider giving it a star, if you’ve enjoyed the game. The code quality is not outstanding. There’s some code duplication and opportunities for templating and decorating, but it’s not terrible either. Contributions and Pull Requests are always welcome.
Development Environment & Setup
If you are a seasoned developer, it’s exactly what you’d expect. You just need NodeJS installed (bundled with NPM) and a text editor. You can download NodeJS here. You can then install React’s npm module at global level, to save you some time in the future if you do multiple projects with it.
npm install react -g
Then use the CRA to bootstrap a project from the TypeScript template, so that we get a lot of the associated boilerplate done for us.
npx create-react-app <name> --typescript
To verify everything is working correctly, you can run inside the created folder:
npm run start
You should see your browser auto-open localhost:3000 and look similar to the below screenshot:
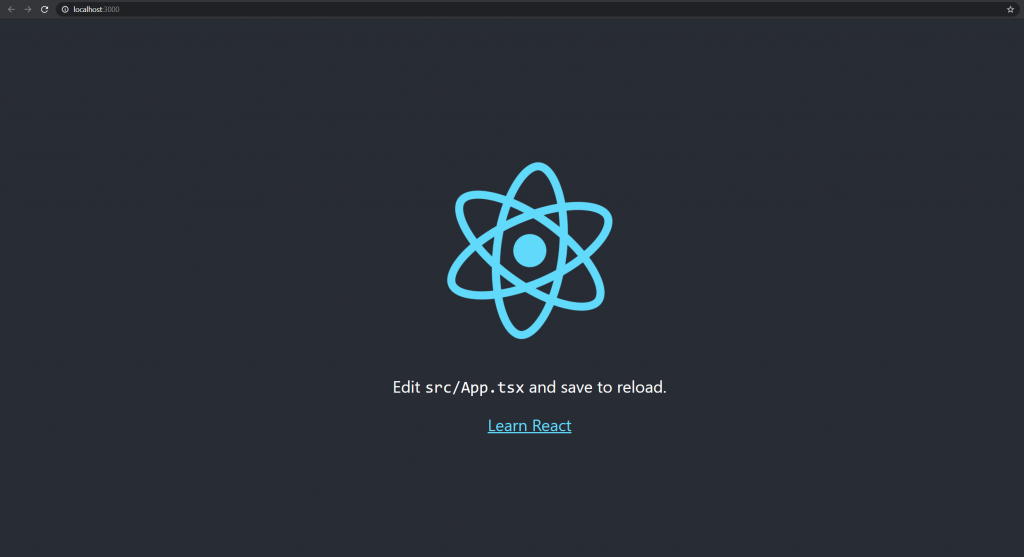
The project CRA creates is a bit on the heavy side, so it might take just under a minute to load. This is the price to pay when you don’t want to deal with raw webpack configurations. On a good note, you get Hot Module Reloading (HMR) out-of-the box, so you get your changes reflected instantly upon saving any file.
Styling
One can’t think of the Minesweeper game, without the old school Windows interface coming to mind. The first time I played the game was sometime in the mid 90’s on a black-and-white laptop with Windows 3.11 and a terrible trackball. What an exciting time it was! So I was looking for a retro Windows-styled library. Et voila! Somebody has already created exactly that – React95.

It had all the basic components I needed. Its storybook documentation was excellent, so I didn’t waste almost any time on figuring it out. Granted, I’ve spent more time than the average person with styled-components, CSS Modules and such, but it’s as straightforward as it gets. Strongly recommend it.
Importing a button looks like:
import { Button } from 'react95';
and using it like:
<Button id={1} onClick={() => console.log("Hello World!")}>
	My Button
</Button>
One thing to note, the library is currently not typed, so to stop your text editor or IDE from complaining, you can add a .d.ts file with the contents:
declare module 'react95';
This will basically stop all the warnings from the missing types. Until such are actually added. If we went with ES6 rather than TypeScript, we wouldn’t have needed this.
Logic
The most interesting part (read the hardest) of building a Minesweeper game is the revealing of the empty cells, in an efficient manner. It could even make for a great coding interview question, as it has quite a few solutions, and can really come up with some clever performant algorithms. So the idea is, upon clicking a cell that doesn’t have a number, reveal all adjacent cells in all directions until you get to a cell with a number. It creates an island-looking structure like below:
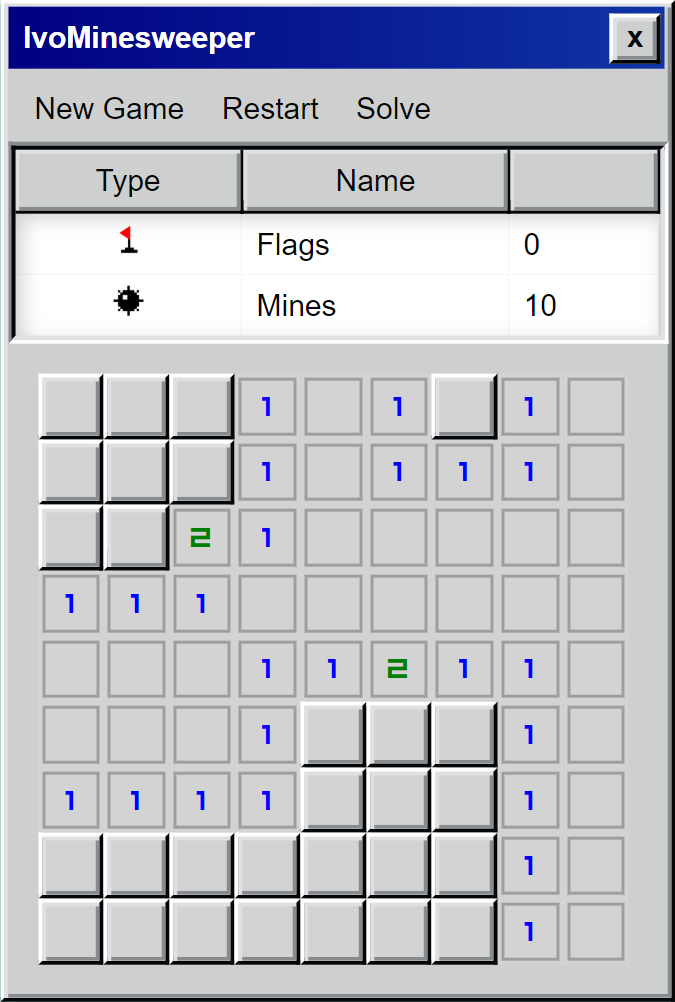
My solution is anything but elegant – it’s a simple recursive traversal. Upon clicking an empty cell, it checks all cells around in a clockwise movement that are empty and pushes them to an array and pops from the list the already checked center cell. Then goes to the first cell in the array and repeats until the array is empty. So in essence you have some duplicate traversal for which you can improve by skipping 1 level of neighbors for checking, etc. You can also look at it as a variety of the greedy algorithm, as you have to get to cells with a number, which will always yield the highest “return”. Anyways, I went for the n2 solution, as it’s a small grid and that’s not the point of the exercise.
React Hooks
Since version 16.8, the introduction of hooks has been the biggest event in the React ecosystem. It dramatically simplified simple projects that needed just a little state or wanted to re-share state between components. You can read more on them here.
In short, you can now have state in a functional component. It looks like this:
import React from 'react';

function App() {
  let [count, setCount] = React.useState(0);

  return (
    <>
      <span>Count is {count}!</span>
      <button onClick={() => setCount(++count)}>Increment</button>
    </>
  );
}

export default App;
In the above example, we create a variable count and a setter called setCount and initialize it to 0 using the useState hook.
If you compare the syntax to a class component with a reducer, it’s a significant step up in readability and getting to the logic. Hooks, literally reinvented the react syntax for me and the way to think about component composition. Hopefully, will also reduce the barrier to entry to frontend development overall.
State, without Redux
Usually, if you want to have state shared between components without getting messy with prop drilling, you would use Redux. But it’s a just too heavy of a solution for a simple game. Quite often, if shown to beginners, requires quite a bit of explanation on its premise – reducers, immutability, state, re-rendering. It’s not really a “hit the ground running” solution, unless you’ve worked with it before.
My goal was to have the entire game running without Redux. Happy to say, I achieved it! One can easily make the argument that this is doable with React Context API already or local storage and cookies. Yes, true. But they aren’t the solution to this particular problem.
Function References
Quite often, you would need a parent component to call a child component function or vice-versa. With Redux, you can create actions and get those functions as properties to your component. Without Redux, you need to do bindings to the component and pass references, if you have too nested components, it can get a bit messy, so useRef, forwardRef and useImperativeHandle hooks to the rescue.
Here’s an example:
// Parent Component
cosnt ComponentA = () =>{
  const myRef: any = React.useRef();

  return(
      <Button onClick={() => myRef.current.newGame()}>
          New Game
      </Button>
      <ComponentB ref={myRef}/>
	)
}

// Child Component
const ComponentB = React.forwardRef((props: any, ref) => {
    React.useImperativeHandle(ref, () => ({
    newGame() {
      console.log("New Game");
    }
  }));
})
This allows the parent component to call a function inside the child component.
For a child component, to call a parent component function, you can pass the setter created from the useState hook as a prop to the component.
TypeScript 3.7
Everyone is heading the TypeScript way and for a good reason. Types reduce the number of errors, improve readability and the language has great support in the face of Microsoft and their industry leading extensible text editor – Visual Studio Code. By far my favorite features are optional chaining and null coalescing. They looks like this:
// Optional chaining

// Instead of this:
if (a.b && a.b.c && a.b.c.d) { // do this }

// Becomes

if (a?.b?.c?.d) { // do this }

// Null coalescing

let x = foo ?? bar()

// Better than using the || operator as it doesn't behave correctly with value of 0.
Optional chaining is something other languages like C# have had for a while. As a fan of C#, I’m quite happy to see this feature make its way into the JS ecosystem. The full list of new features in TypeScript 3.7, you can check out here. Sadly, at the point of writing this, I’m already behind the curve. TypeScript 3.8 was released just about a week ago.
Testing
I was fortunate enough, to have a friend who was willing to play a bit of the game and do the QA testing and find some bugs, which I promptly fixed. The reason I mention this is, in order to save time, I didn’t add tests. Very important! My goal was to finish this in 2 weeks, otherwise as a side project, it will drag on and never be truly complete. In real-world development though, always, I repeat, always add tests. React-testing-framework is the new framework, taking over Enzyme.
Takeaways
The reason I made only a fixed 9×9 size grid, is to get some mobile compatibility on most phones without diving into the CSS and @media queries. Even CSS Grid or Flexbox wouldn’t have helped me here. Styled-components does makes the experience a bit less jarring. I didn’t use it here, but the CSS element is still by far the most annoying part of the whole exercise. Making it a PWA would have been the right approach, but I should have factored this in from the start, which I didn’t.
Having said that, I’m also now convinced that hooks are the future of React together with concurrent rendering, which will be the next major feature. It’s a feature, that doesn’t require you to rewrite your existing code to it. It’s there to make things nicer going forward. With the useReducer hook, you can even replicate a class component. Try them out for yourself!
If you have a fun project you’ve done, feel free to share in the comments below.


0 Comments