Since writing Setting up Oh-my-Zsh, I’ve levelled up in terms of shell usage and customization. I’ve also switched to Windows as my primary development environment due to variety of reasons. The main one being that I finally built myself a desktop PC and switched away from my trustworthy 7 year-old Macbook Air.
Microsoft have come a long way in the past few years with Azure and embracing Linux as the developers’ choice. If you follow this guide the end result should look like the GIF I’ve captured below:
This guide is meant for absolute beginners for setting up a Linux shell environment on Windows 10. The list of plugins covered is a pick and choose approach. Where you should consider usefulness vs speed. Let’s get started.
Here’s a short breakdown of the contents:
- Installation of Ubuntu WSL
- Installation and customization of Windows Terminal
- Installation and setup of zsh and Oh-my-zsh
- Installation and setup of Powerlevel10K (Widgets alongside shell prompt)
- Installation and setup of FZF (Fuzzy Search)
- Installation and setup of Z (Smart Directory Jump)
- Installation and setup of ColorLS (LS with Icons)
- Setting up Visual Studio Code to start from within WSL
- Review the original Oh-my-Zsh post for
Installation of Ubuntu WSL
WSL stands for Windows Subsystem for Linux, where Linux operation system calls are translated into Windows system calls, resulting in a better Linux experience.
Open Powershell and run the following command
dism.exe /online /enable-feature /featurename:Microsoft-Windows-Subsystem-Linux /all /norestart
Note regarding WSL2 (31/05/2020): Since writing this post, Microsoft released WSL2 to the general public, which offers better performance with a few caveats, if you want to enable that one, you need to also run:
dism.exe /online /enable-feature /featurename:VirtualMachinePlatform /all /norestart
After installing Ubuntu, you have to open PowerShell again as admin and run:
wsl --set-default-version 2
If you encounter issues with getting WSL2 running, here is Microsoft’s troubleshooting guide.
Restart your PC and head out to the Microsoft Store and install Ubuntu, or click from here. Click the blue Install button at the top right, where Launch is located as per the screenshot below.
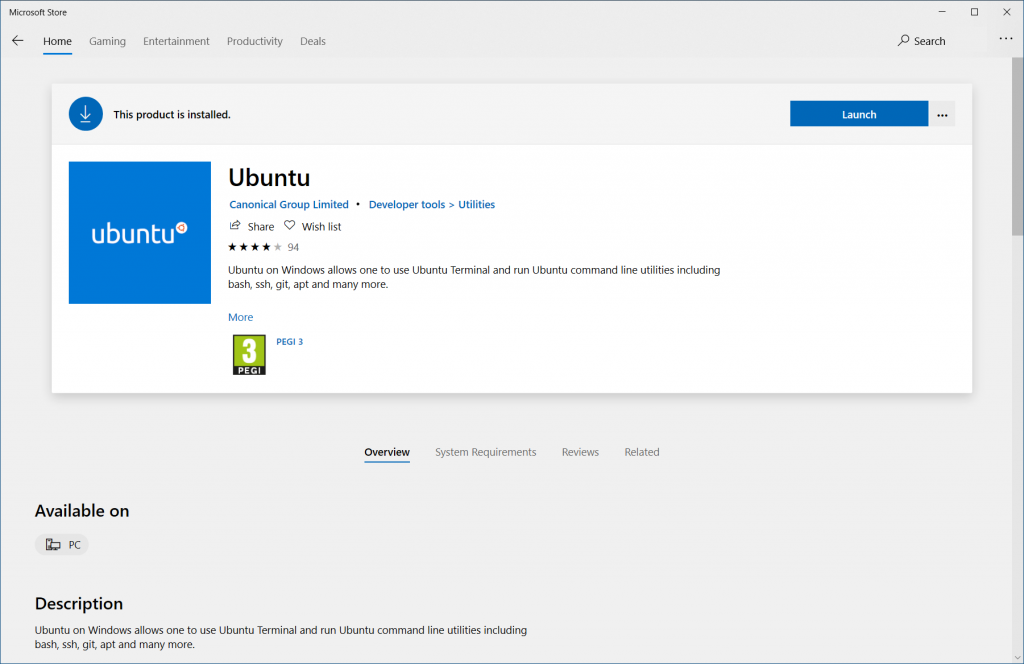
Once done, start it up and it will ask you to create a root account. Enter a username and password of choice. The password will be used quite frequently for installing software as the super user. Once you get prompted with the standard bash prompt. Close the Ubuntu shell.
Installation and customization of Windows Terminal
Then head back to the Microsoft Store again and install Windows Terminal, or click here.
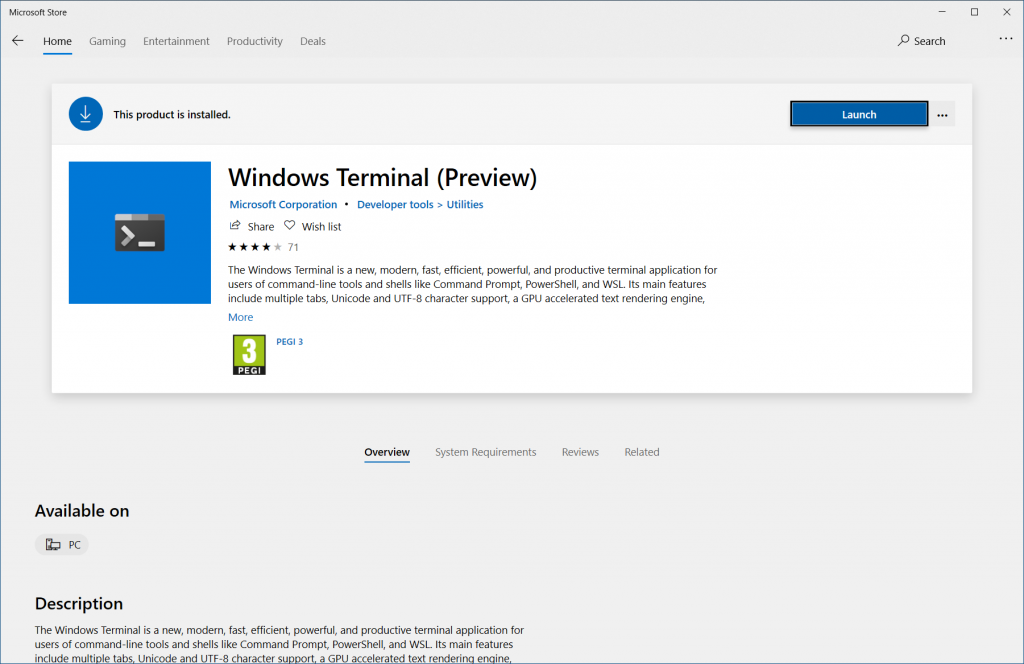
The Windows Terminal is still in preview, as of time of writing, but it’s stable enough for the majority of use cases. It’s meant to get out of preview in May 2020. It will auto-update alongside your other Windows applications, so you shouldn’t worry about it going forward. It’s an open source project and you can view its source code here.
Start up the new shell. It will pick up the pre-installed Ubuntu distribution and appear under the down arrow button, next to the tabs. Should look similar to the below image.

Before we proceed, let’s download and install a font that supports icons and ligatures – MesloLGS NF, download the 4 TTF files and right-click Install inside Windows Explorer. If you already have such a font you’d like to use, you can skip this part.
To customize the colors, font and keyboard bindings, you can click on Settings. It will open a text file with a JSON object inside. It contains “defaultProfile”, “theme”, “profiles”, “schemes” and “keybindings” and others. At the top you should have a link to the schema definition, where you have the entire documentation. For now, let’s just change the layout a bit and the the color scheme.
My root object looks like:
{
    "initialCols" : 170,
    "initialRows" : 35,
    "theme" : "dark",
    "showTabsInTitlebar" : true,
    "showTerminalTitleInTitlebar" : true,
    "wordDelimiters" : " ./\\()\"'-:,.;<>~!@#$%^&*|+=[]{}~?\u2502"
}
I’ve only customized my Ubuntu Profile, don’t replace your guid with the one below. It’s just an example configuration.
{
    "guid": "{2c4de342-38b7-51cf-b940-2309a097f518}",
    "hidden": false,
    "name": "Ubuntu",
    "source": "Windows.Terminal.Wsl",
    "acrylicOpacity" : 0.75,
    "backgroundImage": "<some cool wallpaper>",
    "backgroundImageOpacity": 0.1,
    "closeOnExit" : true,
    "colorScheme" : "One Half Dark",
    "cursorColor" : "#FFFFFF",
    "cursorShape" : "bar",
    "fontFace" : "MesloLGS NF",
    "fontSize" : 13,
    "historySize" : 9001,
    "icon" : "ms-appx:///ProfileIcons/{9acb9455-ca41-5af7-950f-6bca1bc9722f}.png",
    "padding" : "0, 0, 0, 0",
    "snapOnInput" : true,
    "useAcrylic" : false
}
copy the guid and paste it as the value for defaultProfile at the top.
My color theme of choice is One Half Dark, which I’ve slightly modified:
{
    "background" : "#0C0C0C",
    "black" : "#0C0C0C",
    "blue" : "#1170b5",
    "brightBlack" : "#5A6374",
    "brightBlue" : "#61AFEF",
    "brightCyan" : "#56B6C2",
    "brightGreen" : "#98C379",
    "brightPurple" : "#C678DD",
    "brightRed" : "#E06C75",
    "brightWhite" : "#DCDFE4",
    "brightYellow" : "#E5C07B",
    "cyan" : "#56B6C2",
    "foreground" : "#DCDFE4",
    "green" : "#98C379",
    "name" : "One Half Dark",
    "purple" : "#C678DD",
    "red" : "#E06C75",
    "white" : "#DCDFE4",
    "yellow" : "#E5C07B"
}
At this point you should get idea of how to assign “keybindings”. You can have them mimic the TMUX ones, to facilitate the transition if you so wish. The changes are reflected instantaneously.
Installation and setup of zsh and Oh-my-zsh
Once you have the Windows Terminal open, run
sudo apt-get install zsh
It will ask you if you want to make it the default shell, go with yes. If for some reason, it doesn’t ask you, you can run
sudo chsh -s $(which zsh)
Then to install Oh-my-zsh, go with:
sh -c "$(curl -fsSL https://raw.githubusercontent.com/ohmyzsh/ohmyzsh/master/tools/install.sh)"
restart the terminal for the changes to take effect. If all went well you should a colorful green arrow on the left.
It’s very often the case where you might end up with issues on indexing folders where you don’t have permissions to index them for auto-complete. So edit ~/.zshrc and set
ZSH_DISABLE_COMPFIX=true
This will fix the situation with warnings next time you start up the shell.
We are also going to need git for the plugins installs, if you don’t have it already, you can run:
sudo apt-get install git
Now, let’s do the plugins:
Installation and setup of Powerlevel10K
The full page with more detailed instructions is available here. The short version is:
git clone --depth=1 https://github.com/romkatv/powerlevel10k.git $ZSH_CUSTOM/themes/powerlevel10k
then edit ~/.zshrc and set near the top of the file
ZSH_THEME="powerlevel10k/powerlevel10k"
and save. Then run
p10k configure
and customize the display of the shell to your heart’s desire. Some example configurations are displayed below.
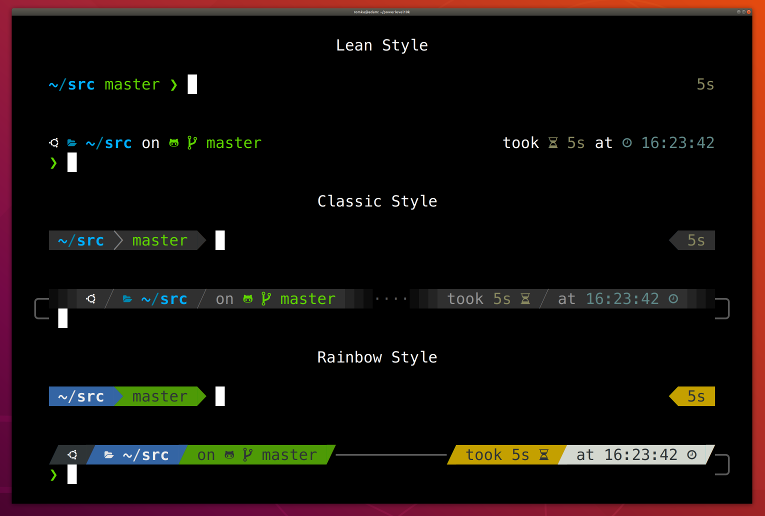
I usually like minimalist designs and go with the lean layout.
Finally, to customize the widgets like, like CPU, RAM or Disk usage or which version of node you are running. You can edit the ~/.p10k.zsh file and under the typeset -g POWERLEVEL9K_RIGHT_PROMPT_ELEMENTS line you can remove the # sign to uncomment the widget and enable it or add it and hide it. Keep in mind, the more widgets you enable, the slower the shell will be.
Installation and setup of FZF (Fuzzy Search)
All the details are available here. The installation commands are
git clone --depth 1 https://github.com/junegunn/fzf.git ~/.fzf
sudo ~/.fzf/install
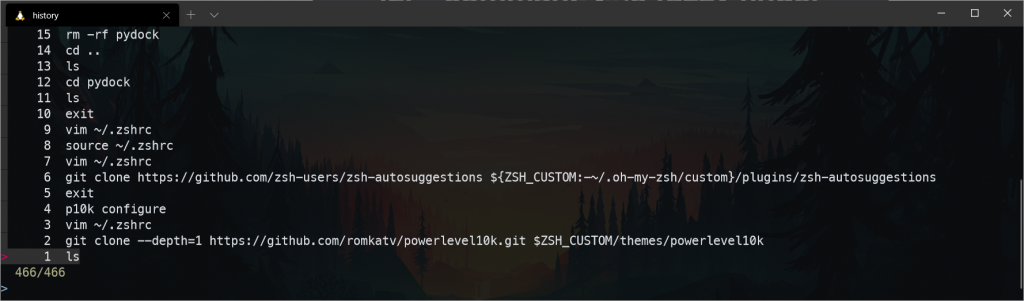
The almighty FZF makes searching a breeze. It supports regex and wildcards. Here’s a screenshot of using it with my command history.
The below demonstration of how powerful the tool is the most comprehensive I’ve found on the internet.
Installation and setup of Z (Smart Directory Jump)
The purpose of ‘Z’ is based on a few character to take you to the directory you have in mind. It’s based on Freceny (a combination of frequency and recency). For example, you usually open a folder that is deeply nested, say ~/first/second/third/myproj, when you type in z myp for example, it will figure out this is the folder you want and take you there. It’s been astonishingly accurate for me, granted I work in no more than 5-6 folder on a regular basis, but it saves me quite a bit of typing on a regular basis. Inside the README in the GitHub repo, it has an a nice example GIF.
To install it:
git clone https://github.com/agkozak/zsh-z $ZSH_CUSTOM/plugins/zsh-z
and edit ~/.zshrc and add zsh-z in the plugins line, like plugins=( git zsh-z )
finish with reloading the configuration shell configuration
source ~/.zshrc
Installation and setup of ColorLS (LS with Icons)
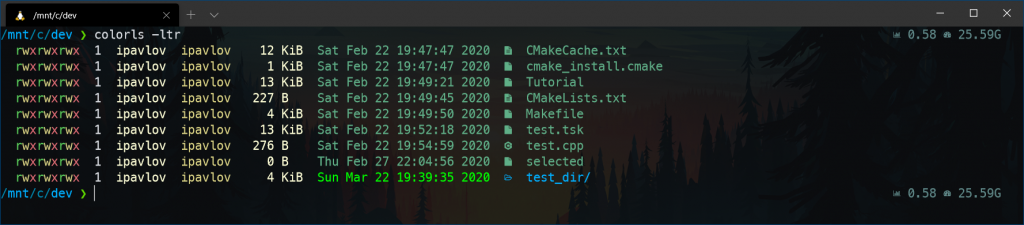
This one is makes your shell quite colorful, it does have a requirement to have Ruby installed. In all honesty, I ended up disabling it after a while, as the ls command became quite a bit slower for large directories, but if that doesn’t bother you. The installation steps are:
sudo apt-get install ruby-full
restart the shell and run
sudo gem install colorls
and add to ~/.zshrc near the bottom of the file
source $(dirname $(gem which colorls))/tab_complete.sh
to have it replace your standard ls command, you can append to ~/.zshrc
alias ls=colorls
The GitHub repo with further details is here. It also contains a more extensive example with a variety of tails you can use.
Setting up Visual Studio Code to start from within WSL
And finally, we can install Visual Studio Code inside WSL, to kick off folder-level editing from the Windows Terminal. Type in
code .
This is the command to start up Visual Studio Code with the current folder as the root workspace. As you don’t have it installed, it will fetch it and install it for you and then start the application. You will need the Remote Development Extension: Remote – WSL, so just install the entire pack for WSL, Containers and SSH – here
Wrapping up
Regarding the Fishhook Autocompletions and Syntax Highlight, you can refer to the original Setting up Oh-my-Zsh that contains the instructions. Despite using iTerm 2 and MacOS in there, the steps are exactly the same.
That wraps up my update guide to customizing a Linux shell for development on Windows in early 2020. If you’ve found any other cool and useful plugins to suggest, post in the comments section below. Until next time!


7 Comments
Khun Myat Min Tun · 19/07/2021 at 3:06 pm
Thank you for this guide. But I have an error when I install Oh-my-zsh. The error message is:
curl: (7) Failed to connect to raw.githubusercontent.com port 443: Connection refused
Ivaylo Pavlov · 19/07/2021 at 6:31 pm
I believe this is caused by a config issue on your side, check your “/etc/hosts” file
anonymous · 31/08/2020 at 10:02 pm
For a faster alternative to colorls, check out LSD (written in Rust). See https://github.com/Peltoche/lsd.
Patrice · 17/07/2020 at 12:20 pm
Thank you for this guide and the useful extra tools! 🙂
Babar · 27/06/2020 at 12:26 pm
I have a question, git within WSL and git in Windows happen to clash as Windows modifies the file. I guess its related to line endings. Have you had that issue?
Ivaylo Pavlov · 27/06/2020 at 12:31 pm
Hey, yes. You can modify your git in Windows setting for the line endings when it checkouts the files with LF, instead of CRLF. https://help.github.com/en/github/using-git/configuring-git-to-handle-line-endings
Vladimir · 29/05/2020 at 3:44 pm
Thanks